

Key Takeaways
Why Fluid Checks Matter
Your car depends on a handful of fluids to protect moving parts, transfer heat, and keep critical systems responsive. When any one of them drops below its recommended level, performance suffers and damage can follow quickly. The good news: checking them is one of the simplest things you can do as a car owner, and it costs nothing but a few minutes.
If you're newer to this kind of upkeep, our beginner's guide to car maintenance explains the foundational tasks and terminology worth knowing before you start. For a quick visual reference on what each fluid looks like and where to find it, see the Car Fluids Quick-Reference guide.
What you will need
What You'll Need
Fluid checks require minimal equipment. Most reservoirs are clearly labeled and visible without removing any components. Gather the following before you begin:
Owner's Manual
Identifies the exact location of each reservoir and the correct fluid specification for your vehicle.
Clean Lint-Free Rags or Paper Towels
Used to wipe dipsticks clean before re-inserting for an accurate reading.
Flashlight or Work Light
Helps you see into a dark engine bay and read fluid levels on translucent reservoirs.
Correct Replacement Fluids
Each fluid has a type specification - using the wrong one can cause damage, so confirm the right product before purchasing.
Funnel
Helps pour fluid into narrow reservoir openings without spilling onto hot engine components.
Work on a flat, stable surface away from traffic. Keep the engine off and allow it to cool for at least 30 minutes if you've been driving - hot engines and pressurized cooling systems can cause burns.
Coolant and Hot Engines Don't Mix
Opening a pressurized cooling system component - including the radiator cap or coolant reservoir cap - while the engine is warm can result in burns from scalding fluid or steam. Always allow the engine to cool fully before inspecting or adding coolant. When in doubt, wait longer.
Step-by-Step: Checking and Topping Off Each Fluid
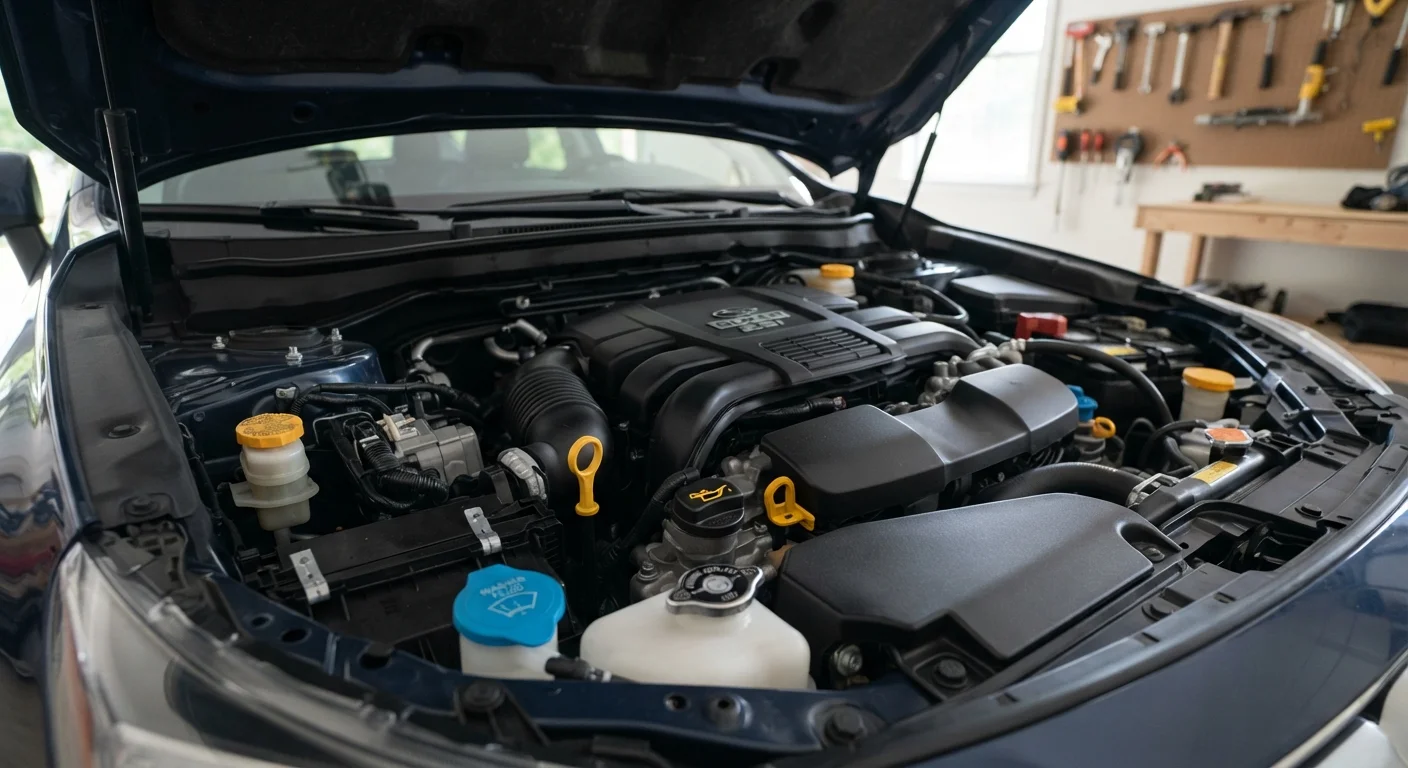
Follow these steps in order. Each fluid has its own reservoir, dipstick, or sight gauge - your owner's manual will show exact locations for your specific vehicle.
Park on a Level Surface and Let the Engine Cool
Pull onto flat ground and turn off the engine. Wait at least 30 minutes before opening the hood - hot coolant systems are under pressure and can cause serious burns if opened too soon. A cold engine also gives you accurate oil and coolant readings.
Check Engine Oil
Locate the oil dipstick (usually a brightly colored loop or handle near the front of the engine). Pull it out, wipe it clean with a rag, reinsert it fully, then pull it out again. The oil level should fall between the two marks on the dipstick. Note the color - fresh oil is amber; very dark or gritty oil may indicate it needs changing, not just topping off.
Check Coolant (Antifreeze)
Find the coolant reservoir - a translucent plastic tank near the radiator with MIN and MAX markings on the side. Do not open the radiator cap on a warm engine. Check the level visually through the reservoir wall. If it's below the MIN line, add the coolant mixture specified in your owner's manual.
Check Brake Fluid
The brake fluid reservoir is typically located near the firewall on the driver's side - a small, translucent plastic container with a screw-on or clamp-on cap. Check the level against the MIN/MAX markings on the side without opening it. If the level is low, add the fluid type printed on the cap (commonly DOT 3, DOT 4, or DOT 5.1). Never mix types.
Check Power Steering Fluid
Many newer vehicles use electric power steering and have no fluid reservoir to check. If your car has hydraulic power steering, locate the reservoir (often labeled with a steering wheel icon) and check the level using either the dipstick attached to the cap or the markings on the reservoir wall. Add only the fluid type specified for your vehicle.
Check Transmission Fluid
Automatic transmissions often have a dipstick similar to the engine oil dipstick - check your owner's manual for its location, since some vehicles require the engine to be warm and running during this check. Manual transmissions typically require a mechanic to check the level via a fill plug. If the fluid smells burnt or appears dark red to brown, schedule a service appointment.
Top Off Windshield Washer Fluid
The windshield washer reservoir is typically a blue-capped plastic tank. It's the one fluid you can top off at any time without safety concerns - just use a premixed washer fluid rated for your climate. Avoid using plain water, which can freeze in cold weather and leave mineral deposits on your windshield.
Frequent top-offs are worth flagging. If you're regularly adding fluid between service intervals, that's a sign of a potential leak or internal issue. A qualified mechanic should inspect the system rather than letting you continue topping off indefinitely. For broader context on what routine upkeep involves financially, the Routine Maintenance Costs guide offers a realistic breakdown.
Troubleshooting and When to Call a Mechanic
Fluid checks occasionally reveal problems you can't fix with a top-off. Watch for these signals:
- Dark brown or black engine oil: May indicate it's overdue for a change, not just a top-off.
- Milky or foamy coolant: Can signal a head gasket issue - stop driving and seek professional diagnosis.
- Brake fluid that's very dark or dropping repeatedly: Brake system leaks are a safety concern. See our brake maintenance guide and consult a mechanic promptly.
- Oily residue around reservoirs: Often indicates an external leak requiring inspection.
Extreme temperatures also affect how quickly fluids degrade or evaporate. Our Seasonal Car Care guide covers what to inspect before summer heat or winter cold arrives. More hands-on tasks you can handle yourself are covered in Under-the-Hood Tasks You Can Realistically Handle Yourself.
Build It Into Your Routine
A simple habit is to check your fluids once a month and before any long road trip. Keeping a log of levels over time makes it much easier to spot a gradual drop that might indicate a slow leak. Your owner's manual will also list manufacturer-recommended service intervals for each fluid - those timelines are a useful baseline.