

Key Takeaways
Why Prep Work Makes or Breaks a Backsplash
Most backsplash projects that fail - tiles popping off, grout cracking prematurely, uneven lines - trace back not to the tiling itself but to what happened before the first tile went up. A kitchen wall near the stove and sink accumulates grease, soap film, and steam over years. Any of those contaminants between the wall and the adhesive create a weak bond, and tile is unforgiving once the adhesive cures. This is why degreasing is the first real step, not an afterthought.
It's also worth understanding the scope honestly before you begin. This is typically a two-day project - day one for setting tiles, day two for grouting after adhesive has cured. Rushing that cure time is one of the most common mistakes beginner tilers make. For a broader perspective on how to plan and pace a DIY weekend job, see our guide to weekend home improvement projects.
What you will need
Materials and Tools You'll Need
Tile selection affects more than aesthetics - it determines which adhesive, which cutting method, and how much time you'll spend. Standard ceramic subway tile is the most forgiving for beginners: it cuts cleanly, bonds well with either mastic or thinset, and costs less per square foot than porcelain or glass. Porcelain and natural stone require thinset (not mastic), a wet saw for accurate cuts, and in some cases a membrane layer for moisture protection behind the tile. Glass tile is visually striking but notoriously unforgiving of uneven adhesive application - any ridges show through the tile face.
When calculating how much tile to buy, measure your backsplash area in square feet, then add 10-15% for cuts and breakage. It's worth keeping a small reserve of the same tile lot number for future repairs, since production colors can vary between batches.
Notched trowel
Spreads tile adhesive (mastic or thinset mortar) evenly to create consistent coverage behind each tile.
Tile cutter or wet saw
Cuts tiles to fit around outlets, corners, and the edges of the installation area.
Tile spacers
Maintain uniform grout joint width between tiles while adhesive cures.
Grout float
Pushes grout into joints and removes excess from tile faces during the grouting stage.
Level and chalk line
Establishes a straight horizontal reference line so courses stay level across the wall.
Grout sponge and bucket
Cleans grout haze from tile surfaces during and after grouting.
Caulk gun and siliconized acrylic caulk
Seals movement joints at countertop edges, corners, and cabinet transitions instead of grout.
TSP substitute cleaner
Degreses the wall surface before tiling so adhesive bonds reliably.
Step-by-Step: Setting and Finishing Your Backsplash
The steps below cover a standard backsplash installation on a smooth, sound wall. If your project involves anything more complex - existing tile removal, damaged substrate, or work close to gas appliances - assess those conditions separately before starting. For larger kitchen renovation contexts, the home renovation planning guide covers how backsplash work fits into a full kitchen project sequence.
Clean and prepare the wall surface
Turn off the circuit breaker for any outlets on the backsplash wall and remove outlet covers and switch plates. Wash the wall with a TSP substitute cleaner to remove grease and cooking residue - adhesive will not bond reliably to a greasy surface. Fill any holes or dents with lightweight spackling compound, let it dry fully, and sand smooth. If the existing drywall is standard (not moisture-resistant), applying a skim coat of tile primer is advisable in areas near the sink where steam is common.
Plan your layout with a dry run
Measure the width of the backsplash area and find the center point. Use a level to draw a light pencil line horizontally at countertop height and a vertical centerline. Lay tiles out on the countertop or floor in your planned pattern without adhesive to visualize spacing, identify where cuts will fall, and confirm the layout looks balanced from eye level. Avoid layouts that leave slivers of tile smaller than half a tile width at the edges - those cuts are difficult and look unfinished.
Apply adhesive and set the first tiles
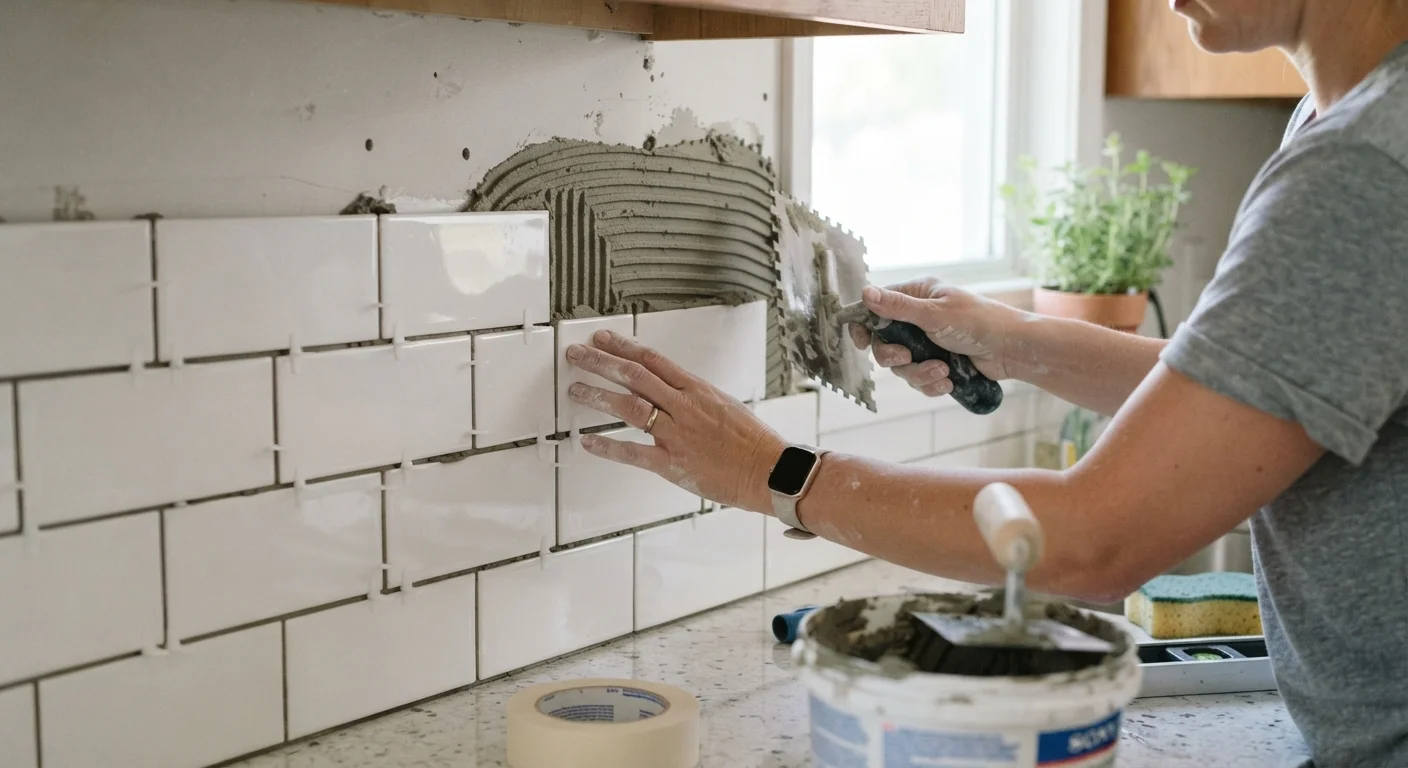
Mix thinset mortar according to package directions, or use pre-mixed mastic for standard ceramic or porcelain tiles in dry areas. Spread adhesive on a manageable section of wall - roughly two to three square feet at a time - using the flat side of a notched trowel, then comb it with the notched side to create even ridges. Press each tile firmly into the adhesive with a slight twisting motion. Insert tile spacers at each corner joint as you go. Check frequently with a level to confirm tiles are sitting straight.
Cut tiles for edges and outlets
Measure each cut tile individually rather than assuming adjacent cuts are the same size - walls are rarely perfectly uniform. Mark cuts with a pencil or china marker. A manual snap cutter works well for straight cuts on ceramic tile; a wet saw is more precise and handles porcelain, glass, and natural stone. For outlet cutouts, a rotary tool with a tile-cutting bit or tile nippers can remove material in small increments. Dry-fit each cut piece before applying adhesive.
Allow adhesive to cure, then grout
Let the set tiles cure undisturbed for the time specified on your adhesive packaging - typically 24 hours for thinset, somewhat less for mastic. Once cured, remove all tile spacers. Mix unsanded grout (for joints 1/8 inch or narrower) or sanded grout (for wider joints) to a smooth, peanut-butter consistency. Work the grout diagonally across tile faces with a grout float, pressing it firmly into joints. After about 15-20 minutes, use a damp sponge to wipe away excess in a circular motion. Rinse the sponge frequently and wring it nearly dry - excess water weakens grout.
Caulk transitions and seal the grout
Once grout has cured (typically 48-72 hours), apply a thin, continuous bead of siliconized acrylic caulk - matched in color to your grout - along the joint between the tile and the countertop, at inside corners, and where the tile meets any cabinet face frame. Caulk flexes with normal house movement; grout at these joints would crack within months. Smooth the bead with a dampened finger or caulk tool, then let it cure fully. Finally, apply a penetrating grout sealer over all grout lines to resist staining and moisture absorption.
Grout Is Not a Substitute for Caulk
A very common backsplash mistake is filling the joint between tile and countertop with grout. Because countertops and walls move slightly at different rates - due to weight, humidity, and temperature - a rigid grout joint at this transition will crack. Always use a flexible, paintable caulk at this joint and at all inside corners. This single detail separates a long-lasting backsplash from one that fails within a year.
Finishing Touches and Common Mistakes to Avoid
Once grouting is complete and everything has cured, reinstall outlet covers (with extenders if needed to account for the added tile thickness) and step back to assess the full installation. Check grout lines for pinholes or thin spots - these can be touched up before sealing. The grout sealer step is frequently skipped but genuinely matters near a stove or sink, where daily moisture and splatter would otherwise penetrate porous grout and cause staining or mold over time.
A few patterns appear repeatedly in failed backsplash jobs: failing to use a level throughout installation, skipping spacers to save time (which leads to wandering joint widths), and grouting before adhesive has fully cured. If your backsplash project is part of a broader kitchen refresh that also involves decorative wall treatments, you may find our article on when accent walls work and when they backfire useful for coordinating the overall look.
When to Call a Professional
Backsplash tiling is a manageable DIY project for most homeowners, but there are exceptions. If your wall has significant moisture damage, soft drywall, or mold behind the old backsplash, those issues need professional assessment before new tile goes up. Similarly, if your tile choice involves natural stone requiring back-buttering, epoxy grout, or special membrane installation, the learning curve climbs significantly.
Electrical Safety Near Outlets
Never work near live electrical outlets. Confirm power is off with a non-contact voltage tester before removing outlet covers or applying any wet materials near the boxes. Outlet extenders may be needed after tiling, since the new tile surface sits proud of the original wall - consult a licensed electrician if you're unsure about the code requirements in your area.